Components
Code Connect
Figma’s Code Connect is a bridge between code and Dev Mode. It will connect your design components to code components. When selecting a component in Dev Mode, you will see an actual code snippet used from the codebase. This can be helpful, but where it gets really interesting is when you pair up Code Connect with Figma MCP. A selection can then be implemented with your actual components without you having to give it literal instructions to do so. Meaning less cleanup work and faster development.
Good to know, Code Connect currently supports:
- React (or React Native)
- When using React you can also integrate with Storybook to make it easier to maintain it together with Code Connect.
- HTML (Web Components, Angular, Vue, etc.)
- SwiftUI
- Jetpack Compose
- For languages or frameworks that are not supported, you can create a custom parser.
Set up Code Connect
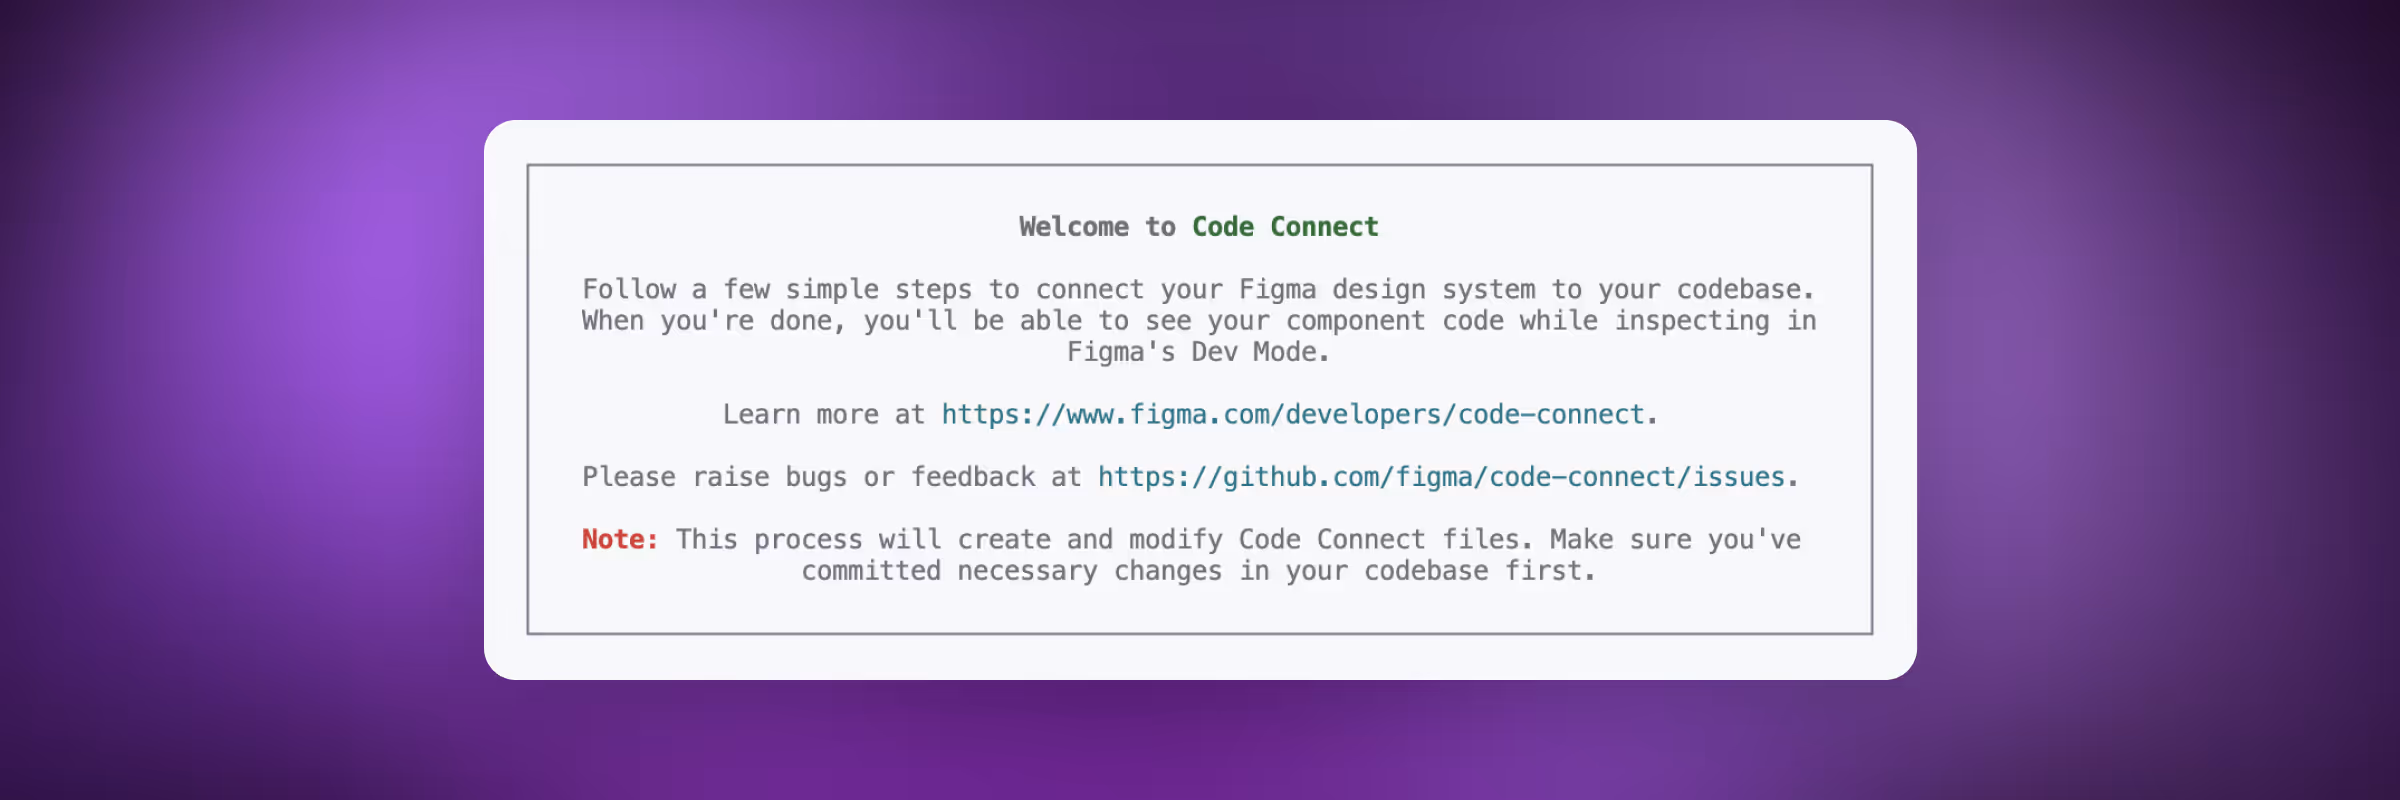
Using terminal
To set up Code Connect using the terminal, you have to follow a few steps:
- Install prerequisites: Make sure Node.js (version 18+) is installed and generate a Figma personal access token. Set the Code Connect scope to Write and File content to Read.
- Install Code Connect CLI: Run
npm install --global @figma/code-connect@latestin your terminal. - Begin interactive setup: In your project root, run:
npx figma connect --token=PERSONAL_ACCESS_TOKEN, and follow the prompts to setup your component directory and Figma design system file URL. - Configure property mappings: Use the terminal wizard to map design component properties to your code components; review, edit, and confirm the generated configuration files. This will be done automatically, but if your Figma components don’t match your code components, you might have to make some changes either in code or design. Make sure your properties are set up in the same way.
- Publish Code Connect files: Run
npx figma connect publish --token=PERSONAL_ACCESS_TOKENto publish your mapped components and make code snippets visible in Figma’s Dev Mode.
Read the full setup guide for Code Connect CLI
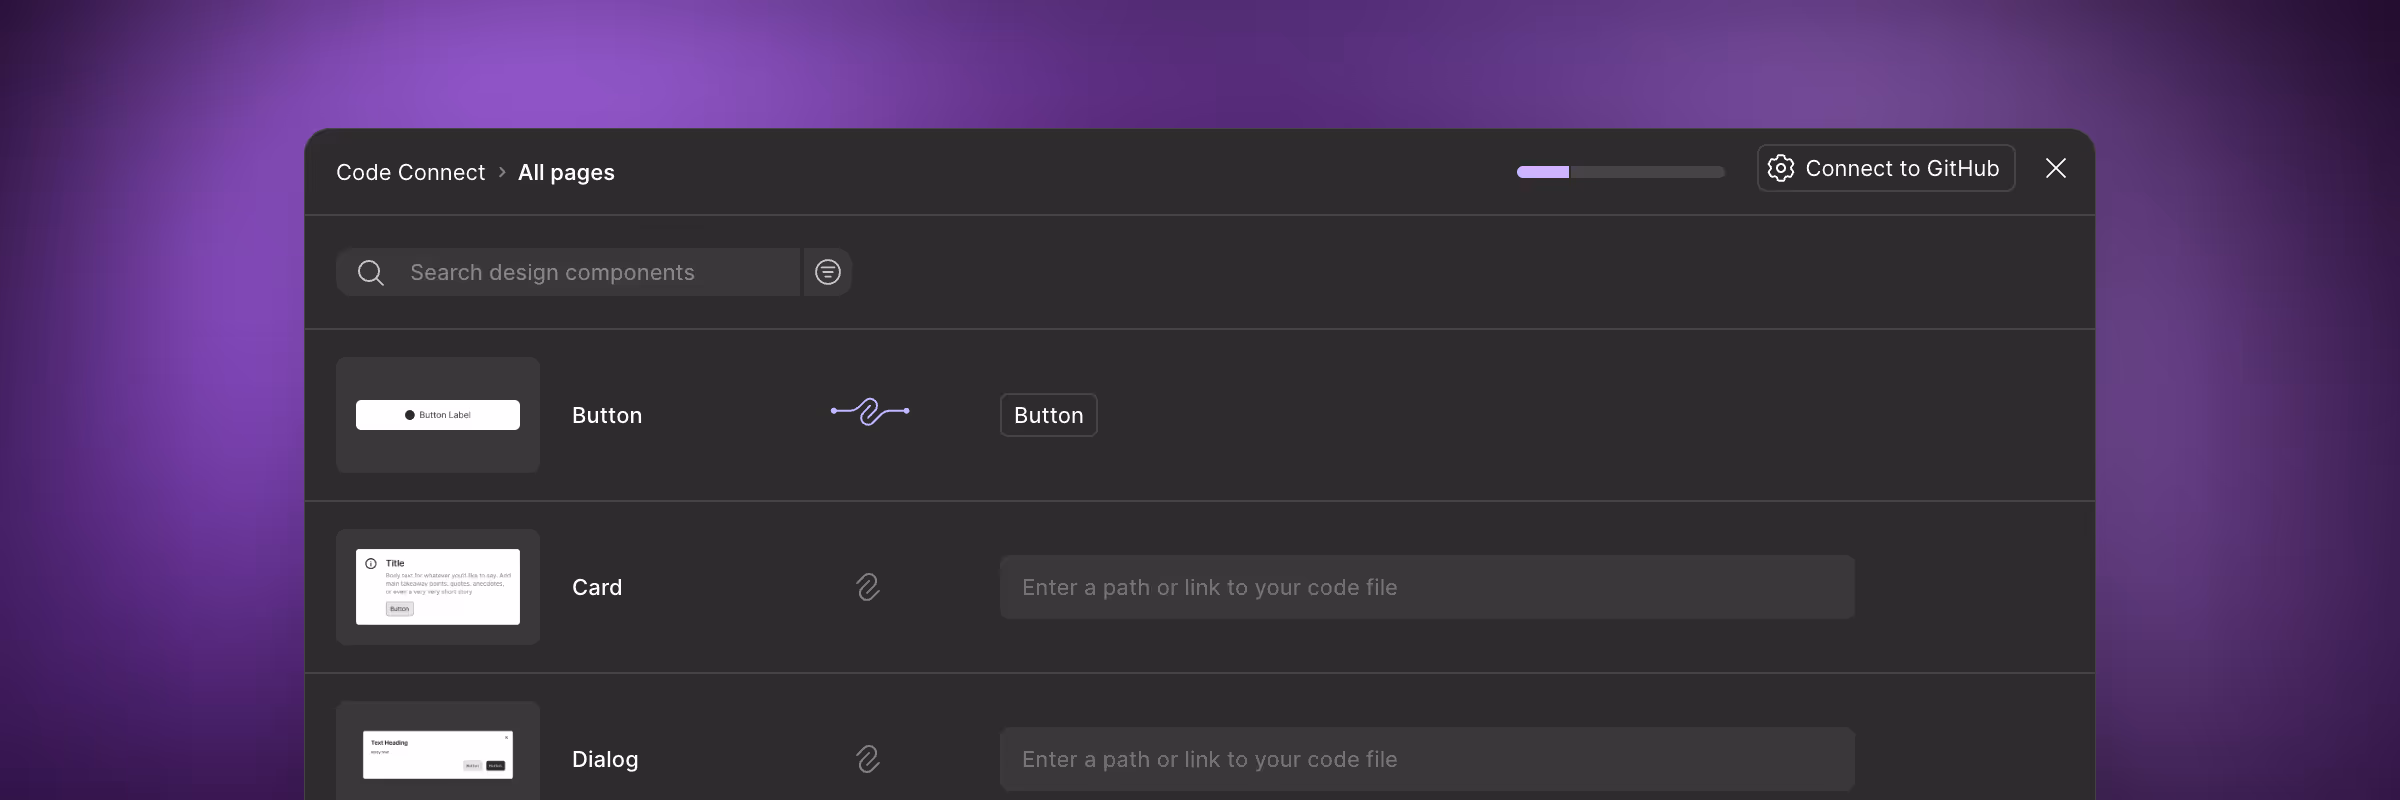
Using the UI
As of October 2025 the Code Connect UI is still in open beta, so this might change in the future.
To open the UI go to a library file and switch to Dev Mode. From the file name dropdown menu select Library > Connect components. When setting up Code Connect using the UI you can either connect a GitHub repo or do a manual mapping.
- Connect to GitHub (recommended by Figma)
You have to authorize Figma to access GitHub. After that, you can select components directly using the interface. - Manual mapping
If your code is not in GitHub, you can do a manual mapping. For this, you will have to manually add the file path or URL and the component name.